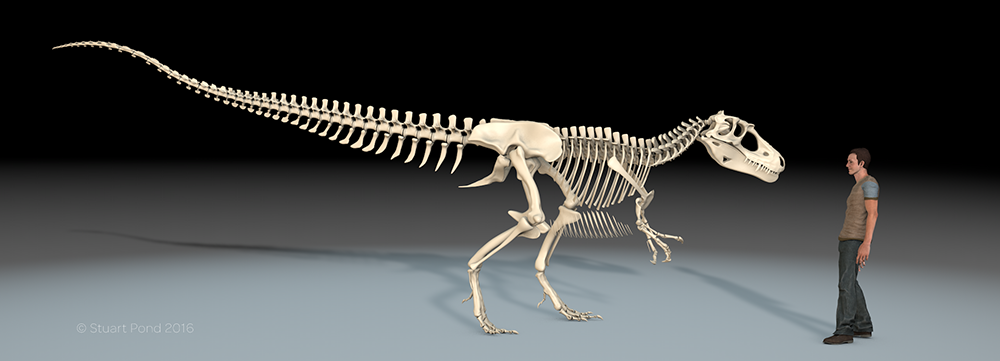
Thursday, 6 June 2013

Building a dinosaur: the finished Triceratops sculpt

It's been a while coming, but the Triceratops sculpt is finally finished. At this advanced stage the fine detailing is added to the mesh as well as any adjustments that may be needed to  morphology.

Central to this stage of the process is gathering reference; in fact this task runs through every stage during the creation process. This involves looking for papers on integument, lesions on the skin as well as gathering references on colour and skin texture. Using extant phyogenetic bracketing (EPB) we can infer certain things about how a Triceratops might have looked; for instance we know birds have very bright colouration and the males often have structures designed for display, so we can consider whether ceratopsians used their head ornamentation for only for display or perhaps defence or species recognition too. We have fossil impressions of chasmosaurine skin so we have a reasonable idea how parts of the skin of Triceratops looked in terms of topology and we can look at extant animals and observe their colouration and how it relates to their ecology. One tool I've started using a fair amount to gather reference is Pinterest, which allows me to 'pin' images from the web to virtual boards, and works both in the browser on my desktop and in a standalone app on the iPad and iPhone. Using this tool it's possible to gather good reference quickly and easily, and store it all at one location that is accessible online.

Although we're not actually texturing this model at this stage, to my mind it's essential to consider integument when detailing a sculpt as it may well affect some of the decisions you make when adding detail will be reflected if you decide to texture a model.

I did all the detailing in zBrush, as this allows the artist to work at high resolution and at speed. I tend to create my own alphas as this gives me more control, but the built-in alphas are usable and a Google search will turn up many sources of free alphas to download. These can be resized to give different sized brushes and for the scales of Triceratops I created this alpha:

Ceratopsian scales. Oh yes.
I traced some scales from a reference image of ornithischian skin and blurred the image slightly to avoid jagged edges on the geometry. As scale size is not uniform over the body on either extant or extinct animals the ability to adjust the draw size gives flexibility when adding scales.

Next I added wrinkles, scars and detail to the horns and claws. I turn off symmetry on whatever brush I'm using for the final part of this to ensure variation which adds visual interest. I roughen up the skin here and there, add a few lumpy bits and other marks as this Triceratops is an older animal that bears the scars from it's years living in the Late Cretaceous world.

Detail of the hoary head.


Finally, I seek the comments of palaeontologists and other illustrators and make any suggested amendments. This is an important stage; it's very easy to get too close to your work sometimes, and you can end up making errors that are, when pointed out, embarrassingly obvious. Moreover, getting someone with experience to critique your work means you will have the most subtle of subtle changes pointed out to you, and this is a great opportunity to learn. It will help you immensely with the interpretation of the reference material used when creating artwork in the future.

So that's it! I'm now looking to get a 3D print made of the model, and I will texture and pose it of course, but that's it for the time being. I will hopefully get around to animating it at some point too.

Big thanks to all those who have commented during the process and especially to Scott Hartman for his invaluable input.

Tuesday, 28 May 2013

Jehol-Wealden International Conference 1st Circular


The first circular for Celebrating Dinosaur Island: Jehol-Wealden International Conference is now available for download here. For further information and proposals for presentations and posters contact: gareth.dyke@soton.ac.uk

I hope to see you there!

Friday, 10 May 2013

A photogrammetry primer for palaeontologists

video


One of the big advantages of photogrammetry is the ability to gather high-quality data quickly and easily. The tools are available to anyone and are often free, open-source or reasonably cheap. As mentioned in the previous post the work flow can be summed up as follows:
  1. Take overlapping photographs.
  2. Load into photogrammetry application.
  3. Generate a point cloud (the software looks for points on the various photos and these are assigned a point in 3D virtual space).
  4. Generate mesh and texture (if required).
  5. Output, analyse and share.
The quickest way to start is using an online photogrammetry service. The best I have come across is Autodesk's 123D Catch, which is an easy and quick way to get started and produces pretty good results. You can use 123D Catch on your smartphone or tablet and as an internet service you need no other software to generate meshes and the app takes care of steps 2-4 in the workflow above. The app will generate .obj files which are read by every major 3D package including the excellent MeshLab, which I suggest you download (it's free) if you are thinking of incorporating photogrammetry into your own palaeontological skill set as it's useful for reviewing meshes.

Good though 123D Catch and similar online packages are, if you're serious about photogrammetry then  eventually you'll want to get dedicated software. The application I favour is called Agisoft Photoscan which comes in two flavours, Standard and Professional. I use the standard version and this is more than adequate for my needs plus is cheaper (the Standard version costs $179 and the Pro version is $3499 - ouch!), which counts as I am self-underfunded. An alternative is Peter Falkingham's excellent VisualSFM which is free but doesn't generate meshes, only point clouds. I say 'only', but the point cloud data is really the important bit and this is the basis for any analysis that might be performed on the data. However, the artist part of me likes to see images that look more solid so I prefer to generate meshes and for outreach and other purposes a mesh is desirable.

So here's a run through the workflow mentioned above, that should be enough if you wish to get started using photogrammetry.

1) Take overlapping photographs.

It's quite possible to generate usable 3D data by taking two overlapping photographs. However, the more data the better so I take a sequence of images, normally about nine but this can be far more according to the size and detail of the subject. There are some ground rules when taking images for photogrammetry: photos must overlap by no less than 60%, you must keep the camera a consistent distance for each shot, and you must keep the camera perpendicular to the subject.  As an example, for a single footprint you might take 3 shots with 60% overlap at the first pass with the camera in it's normal orientation, go back to your original and rotate the camera -90 degrees and take 3 more, rotate the camera 180 degrees and take the next sequence.

Eubrontes footprint from Warner Valley, Utah recorded using ye olde traditional digital photograph.

Here's a sequence I took of the same footprint ready for loading into Photoscan:

Sequence of images of the print.


2) Load into a photogrammetry application and 3) Generate a point cloud. 4) Generate mesh and texture.

Photoscan has a step-by-step approach to building meshes that is very easy to use. You load your images, the software then aligns them, generates a point cloud, then a mesh and finally a texture if desired.

This is a point cloud of the print, seen from above and generated from the image sequence above.


The same print, with mesh generated from the point cloud data and with a texture applied.


And that's it! The mesh can now be saved as any number of file types for loading into other programs for further analysis, and shared via email or cloud services with colleagues across the globe. If desired,  a 3D printer could be used to create a physical copy of the mesh, essentially returning the subject to the physical realm from the digital.

Uses for meshes:
Clockwise from top left: untextured mesh with adjustable lighting,
full textured mesh, colour elevation and contour generation,
anaglyphic stereo.

I hope this will encourage you to explore the technique of photogrammetry, and incorporate the method into your research workflow if applicable. This post has really only scratched the surface of what is possible with photogrammetry and associated techniques, such as recording objects in the round (see movie of cast below) and the methods used in processing to get really good results; these are subjects for a book rather than a blog!

video


If you do want to learn more and are heading to the SVP in Los Angeles this year then I highly recommend the workshop that Neffra Matthews and Brent Breithaupt are hosting during the meeting. They are two pioneers of the technique in the context of palaeontology and are excellent communicators to boot and there is no-one better to learn from.

Photogrammetry workflow. Click to embiggen.

Now go and get started!

Ref:
Pond, S., et al.,The ichnologists guide to 3D models: from the field to the cloud. DigitalFossil Berlin 2012 Abstracts of Presentations. Available at: http://www.naturkundemuseum-berlin.de/forschung/tagungen/digitalfossil-berlin-2012/home/abstracts-of-presentations/#c24993

Tuesday, 23 April 2013

The Photogrammetrical Palaeontologist

I don't get out into the field anywhere as much as I would like to, and when I am out there I want to be sure I can record as much data as possible, as accurately as I can. In the past this has meant using tracings, drawings, field notes, measurements and photographs to record tracks*, the location of a specimen or if excavating a specimen, the site itself. All good techniques and methods no palaeontologist worth their salt is likely to abandon in the foreseeable future, but what if you could record field localities in a way that you meant you could analyse, share with colleagues and present them back at your workstation, with sub-millimetre accuracy and all the detail visible in the field? What if you could have a scaled-down, physical section of a partially excavated skeleton from your quarry to help plan the next field season? In fact, you could be sharing not just data from the field, but specimens from collections or that you're working on right now. In the past the tools for acquiring high-quality 3D data have often been expensive and not available to all workers; we can't all afford a luggable Lidar unit to record our quarries or outcrops. As the shiny digital future becomes everyday reality a number of imaging techniques are now being used to analyse 3D data from specimens and field locations on equipment we all have, such as laptops and mobile devices.

A large ornithopod footprint in the back garden of a collector on the Isle of Wight.
Not so easy to share with your colleagues across the world? You can with photogrammetry!

Photogrammetry is one of these techniques. Most palaeontologists and amateurs will already have the tools to practice photogrammetry in their field kit: a camera and a laptop. In fact, your mobile phone and an internet connection will enable you to produce reasonable quality 3D data very little time using free software, downloadable right now.

So what is photogrammetry? It's the technique of generating a 3D point cloud from a series of overlapping photographs and at it's most basic a mesh can be generated from a stereo pair, but in most cases more images are better. It is capable of sub-millimetre accuracy and can capture virtually any subject, including outcrops and objects in the round. Photogrammetry has several advantages over traditional techniques. As mentioned earlier most of us having the equipment needed as part of our regular field kit and  vitally photogrammetry is totally non-destructive and this is important when recording delicate fossils as well as tracks and traces as often a traditional technique (for example creating a mould) will cause some damage to the fossil as part of the process. The software used to generate the 3D data is free, multi-platform, open-source or relatively cheap and capable of excellent results.

Chirotherium footprint, textured 3D mesh.


One example of a photogrammetry workflow is as follows:

  1. Take overlapping photographs.
  2. Load into photogrammetry application.
  3. Generate a point cloud (the software looks for points on the various photos and these are assigned a point in 3D virtual space).
  4. Generate mesh and texture (if required).
  5. Output, analyse and share.

The 3D data has one huge advantage over traditional data: it's very easy to share. You could record a specimen in the field, generate a point cloud and the a mesh, save it into any one of a variety of formats read by a variety of apps. This data could then be emailed, uploaded and shared with colleagues across the world, all from your position in the field (provided you have internet access).

Another Isle of Wight footprint, this time a theropod track which some gooner has
tried to remove with a rocksaw. I recorded it using photogrammetry and did no damage at all.
An untextured 3D mesh.

This data has a wide variety of uses. The point cloud and mesh generated from it can be used for morphological analysis, measurements, false colour and contour analysis and light sources etc can be manipulated to aid interpretation. The meshes can also be 3D printed to bring the specimen back into the physical realm; want to have a scaled 3D version of that Allosaurus skull you excavated last field season on your desk? Use your photogrammetry data!

PG data also has potential as uses when publishing research, as stills in a paper and animations and meshes supplied as part of the supplementary data of papers. 3D works particularly well for outreach too, with animations and 3D video particularly useful for encouraging engagement.

So how to start in photogrammetry? Watch this space!

*You might notice this post is ichnology-centric. For that, I make no apology at all.

Friday, 29 March 2013

Scientific illustration: Cell schematic


Generic human cell illustration. Click to embiggen.


I've recently been working on a piece that I thought might be of interest to readers of this blog as although it's not palaeontology, who can resist a bit of biology?

This is a 3D model created in entirely in Maxon's excellent Cinema4D of a cell that is gracing the front page of my day job website (www.stupond.com), and is a schematic of a generic human cell showing the basic structures and organelles commonly present in many cells. This could be animated or labelled is needed.

Next on the personal learning curve is getting to grips with Maya, one of the real heavy-hitters in the world of 3D modelling with a learning curve to match. Exciting stuff!

I hope you like the illustration.


Monday, 11 March 2013

Building a dinosaur: Starting to detail Triceratops


The next stage in the construction of our Triceratops model is one on the fun parts of creating 3D models: detailing. This is mainly carried out in zBrush and takes full advantage of the symmetry option which allows the artist to mirror brush stokes over the axis of choice. This means you can add detail without having to do it twice and as dinosaurs are symmetrical this is extremely useful. Of course, there will be subtle asymmetrical details that will need to be added but these can wait until we have the main details sculpted.

As with the rest of the modelling process, detailing is best approached by starting out with the larger details first and working in ever-increasing resolution as the finer details are added. There are decisions to be made at this stage too, deciding how much to actually model with geometry and how much to add using displacement maps and texturing. For the time being, I'm going to continue adding to the geometry as we're still dealing with larger details rather than the tiny stuff.

As you can see I've started to refine some areas that were difficult to model by pulling polygons and points, such as much of the skull detailing including the rostral and orbit areas, the epioccipitals and general refinements around the skull. I'm also adding wrinkles to the skin, especially in limb areas. I'm also attempting to keep the animal looking quite fleshy as I'm anxious too avoid an overly skinny look with bones poking through everywhere. Most of this work is done using standard zBrush brushes and alphas; the need for custom alphas will be when the finer detailing such as skin texture is being applied.

Many of the decisions on how the muscles look are based on our earlier reconstruction of the musculature of Triceratops, but at this stage it's worth considering how the integument of the animal affects the way the skin might fold and fall across the skin and muscles. Keep referring to any reference you have gathered and be mindful of the analogues you choose; elephant skin is probably very different to ceratopsian skin, so do the research. More on this in the next post.

Sunday, 17 February 2013

Celebrating Dinosaur Island in September 2013

The University of Southampton has announced it will be hosting a meeting called Celebrating Dinosaur Isle: A Jehol-Wealden International Conference on 20th and 21st September 2013 at the National Oceanography Centre in Southampton. UK and Chinese palaeontologists will present their research, and the meeting will be an excellent opportunity to forge new contacts and discuss future research. There will also be an opportunity to visit some of the main fossil sites on the Isle of Wight, which is a hop over the Solent from Southampton.

More programme information as it comes through, in the meantime here is the poster.


In the interests of full disclosure I have to state I am a research associate with the University of Southampton and also designed the poster. The image on the poster is a reconstruction of the skull of Neovenator salerii, a theropod dinosaur unique to the Isle of Wight.